
Welcome to our guide on how to troubleshoot the Kernel_Data_Inpage_Error for Windows 8/10. Inside you will discuss probable reasons for the Kernel_Data_Inpage_Error, as well as the means to fix them.
Blue Screen of Death (BSOD) crashes can be really frustrating, especially when you do not know what has caused them. Oftentimes, bringing the computer to a specialist is the best course of action, especially if you do not think you can troubleshoot the issue yourself. However, in many cases you can have the problem solved without the need for professional help. Let’s do it together!
If you are currently experiencing the Kernel_Data_Inpage_Error in Windows 8 or 10, we can give you several possible fix methods that you can try right now. Generally, the most common causes for the Kernel_Data_Inpage_Error are bad HDD blocks (sectors), loose cables that do not establish a proper connection to your hard-drive, a problem with your RAM or depletion of nonpaged pool memory. Here, we will attempt to help you figuring out which one of these is the cause for the BSOD and how you can fix the problem so that no more system crashes occur.
Kernel_Data_Inpage_Error Fix
The Guide
Enter Safe Mode
Almost always, the first step that needs to be taken when troubleshooting a BSOD error is to boot the computer in Safe Mode. When in Safe Mode, your system is much more stable due to the fact that only the most important system processes are active. Everything that is not essential for the functioning of your OS is left out. If you do not know how to boot into Safe Mode, this guide will show you how you can do that.
Check Disk
As we already mentioned, one of the most common causes for the Kernel_Data_Inpage_Error is bad sectors on your hard-drive. Luckily, Windows has a built-in feature that, when used, checks your HDD for bad sectors and if any are detected, Windows attempts to repair them.
After you have booted your machine in Safe Mode, use the Check Disk function to find out whether the Kernel_Data_Inpage_Error BSOD is caused by bad sectors on your hard-drive and have them repaired. Here is a link to a guide that will teach you how to use Check Disk.
Memory test

Another very common reason for the occurrence of the Kernel_Data_Inpage_Error is a problem with your RAM. It could be that a RAM stick is failing or is not properly fitted into its place. Whatever the case, you’d need to find out whether the issue is coming from your RAM. There are several ways to do that.
- Our first suggestion here is to run the program called memtest86. It’s a free tool that you can download right now. The program tests your computer’s memory and if there are any errors found, they would be displayed on your screen and that way you’d know that the BSOD crashes are almost certainly due to bad or incompatible with your system RAM sticks. You can learn how to use Memtest86 in this guide.
- The second option that might help you determine whether the error is caused by failing RAM is to shut down your PC and manually open its case. Then take a look at the RAM sticks to see if any of them are not tightly fitted or physically damaged. You can also try to remove them, one by one, and turn on your PC in between. That way you might be able to which one is being problematic and replace it with a new one. If you have recently bought new RAM sticks, you might ask for a refund if it is determined that the kernel_data_inpage_error is indeed coming from the new memory. It is also possible that the RAM you bought is simply not compatible with your computer, so keep that in mind.
Set your non-paged memory pool to be managed automatically
Usually, the automatic management of your nonpaged resources should be automatic by default. However, if, for whatever reason, your system does not automatically manage the pagefile, BSOD crashes such as the kernel_data_inpage_error are likely to occur. Here is what you need to do to fix that:
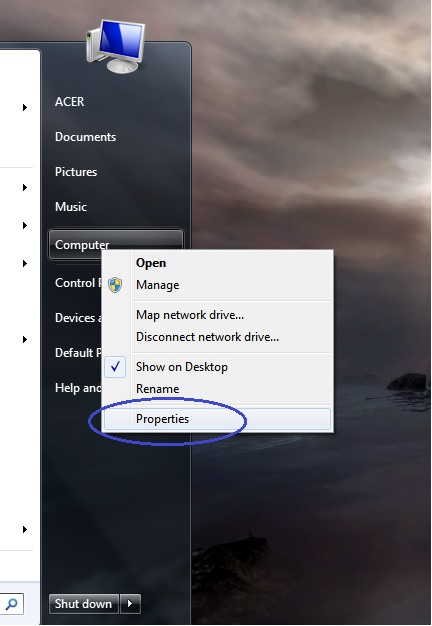
- After having booted into Safe Mode, open the Start Menu right-click on Computer/My Computer.
- Select Properties.
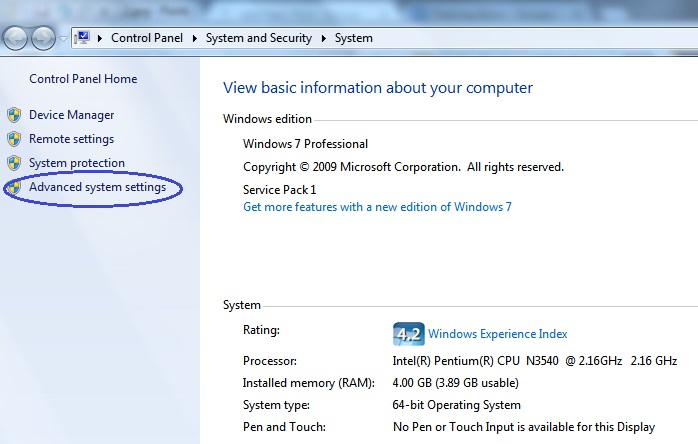
- In the resulting window, click on Advanced System Settings (right-pane).
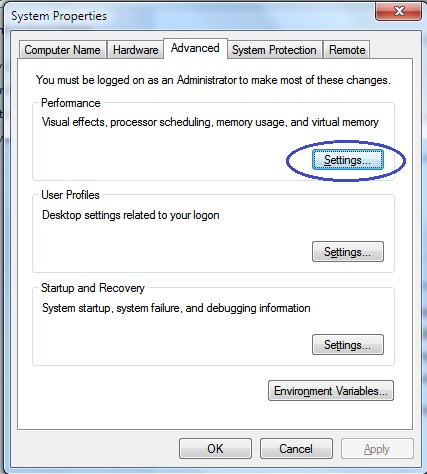
- Next, go to the tab labeled Advanced.
- Click on Settings under Performance.
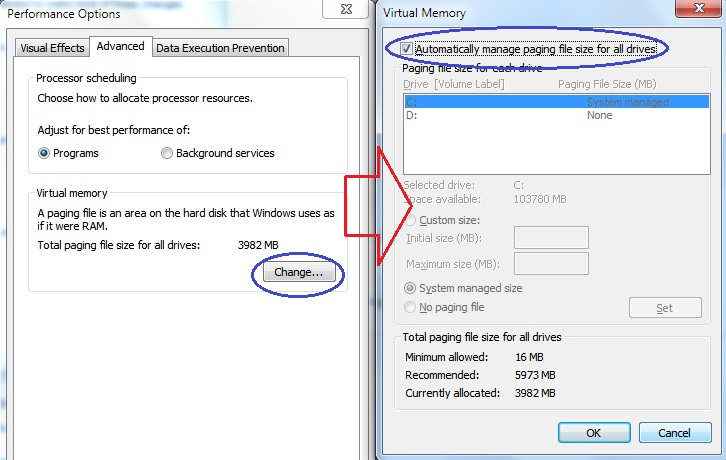
- Go to the Advanced section.
- Under Virtual Memory, select Change.
- The checkbox next to the Automatically manage paging file size for all drives option must have a tick. If it does not, check that option and then click on OK. Click OK on the other opened windows.
Did we help? Have any questions? Feel free to contact us in the comment section below!


Leave a Reply