
In the following guide you will learn a couple of possible fixes of the irritating “Windows Update Client Failed to Detect With” Error. The guide works for all latest Windows versions.
Windows Update is a very useful feature that automatically updates your system straight from the official Microsoft site. This means that you don’t need to manually download and install every new system update as long as the WU function is enabled. Unfortunately, sometimes this feature might malfunction due to various reasons. In those cases you will be shown an error message that says Windows Update Client Failed to Detect. If you’ve encountered this error, there is an update that is accessible for your PC, but cannot be found by WU. If you want to have your system up-to-date, you’ll need to resolve this minor inconvenience and here we will guide you through two possible methods that you can use to fix it.
“Windows Update Client Failed to Detect With Error” Fix
Fix 1: Re-installing WU
This is basically restarting the function in order to get any bugs and errors out of the way that might have caused the inability of your system to find the update and install it, thus causing the Windows Update Client Failed to Detect problem. Here is what you need to do:
- Press Winkey+R from your keyboard to invoke the Run window.
- In the search field copy-paste the following line: C:\Windows\System32\Net stop WuAuServ

- Press Enter. By doing this, you will stop the Windows Update.
- Next thing you need to do is open one of the following links to download the installer for the Windows Update. Take notice of what system you are using.
- Once you’ve downloaded the WU installer that corresponds to your Windows version, open it.
- After it loads, you’d probably get a message which tells you that an install is not needed, because Windows Update Agent has already been installed on your PC. If that’s the case, right-click on the installer and go to Properties. In there, rename the installer to WindowsUpdateAgent20-x86.exe /wuforce and click on OK.
- Now, re-open the installer by double-clicking on it. This time, you should be allowed to carry on with the installation.
- Once you’ve installed the Windows Update, re-open the Run window and copy-paste this line C:\Windows\System32\Net start WuAuServ. Then hit Enter. This will re-enable the WU service and you should no longer get the irritating Windows Update Client Failed to Detect error.
Fix 2: Deleting WU temporary files and folders
If the issue that you’re facing wasn’t solved by the previous fix, you can try this one instead.
- Open Run (Winkey+R) and type services.msc.
- Hit enter and from the list of services find the one named Windows Update.
- Right-click on it and select Properties.
- Click on Stop and then on OK.

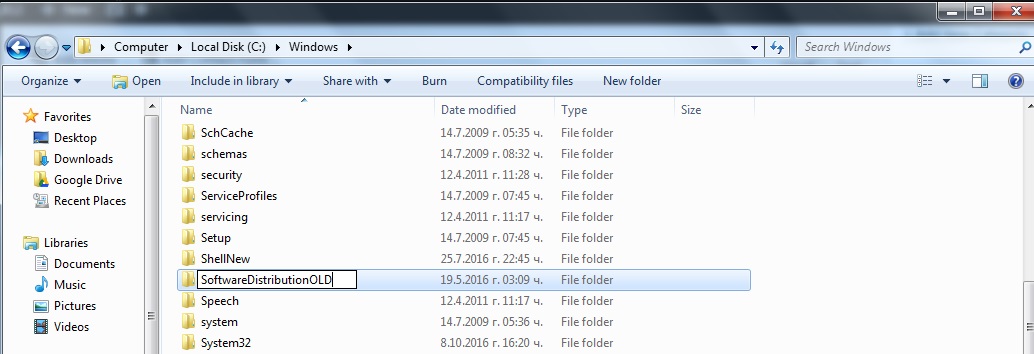
- Go to My Computer\C:\Windows.
- Rename the folder SoftwareDistribution to SoftwareDistributionOLD.
- Go back to the Services and once again open the Properties of the Windows Update service.

- Select Start and then click on OK.
After doing this, you should no longer have problem with the Windows Update Client Failed to Detect error.


Leave a Reply