
Many users have reported seeing a notification about the same “80073701” error related to updating their Windows OS. That is why the following article has been created – with the intent to assist the affected users in resolving this issue.
Origin of the issue:
Whenever you are trying to apply an update to your Windows OS, an error notification is generated (containing the “80073701” error code) and the update doesn’t go through. Our recommendation is attempt to perform the instructions below for solving this problem.
Error Code 80073701 Windows Fix
Possible solutions:
- First of all, you need to try rebooting the Windows Update Components. Then you should check and see whether you can set them up. You can do that by running the Windows Update Diagnostic and follow the instructions there. If you are unable to automatically do that, please check the steps below for more details on how to do that in a manual way.
When it comes to resetting the Windows Update Components in a manual way
Sometimes performing a reset of the Windows Update Components could result in resolving the problem. By restarting these components you will fix the corrupted ones among them. Then you might be able to apply an update successfully. If you want to restart the Windows Update Components, please go with the instructions below:
Open Command Prompt with administrator’s rights.
Immediately after the command prompt is generated, you should put an end to BITS, MSI Installer, Windows Update service and Cryptographic. Do that by simply writing the following commands into the command prompt window. Don’t skip pushing Enter as soon as every single command has been entered to terminate the services above.
-net stop wuauserv
-net stop cryptSvc
-net stop bits
-net stop msiserver
Alter the names of the SoftwareDistribution and Catroot2 folders. Apply the commands below into the command prompt in order to change the names of these folders.
– ren C:\Windows\SoftwareDistribution SoftwareDistribution.old;
– ren C:\Windows\System32\catroot2 Catroot2.old;
As soon as you are finished, just restart the processes and services that you had stopped in step №2 in the previous paragraphs. For that purpose enter the following commands into the command prompt:
-net start wuauserv
-net start cryptSvc
-net start bits
-net start msiserver
Leave the command prompt
Reboot your device. Then try to run the desired update.
2. Try to solve the issue with the System Update Readiness Tool.
So, all you have to do is to open this program (checksur.exe) and install Service Pack 1. In order to help you complete that, we have prepared the small guide below.
-Browse the web and download the executable file mentioned above from its provider’s web page. Then select Open. As soon as the Windows Update Stand Alone Installation Wizard appears, click on the button saying Yes. Perform the installation process by closely following the instructions in the wizard and select Close to finish it. Then click the Start button. You will see a search box, write cmd there. Then the result from the search will be shown – choose cmd.exe.
– Enter Command Prompt. Inside it, enter scf/scannow.

Hit Enter and wait until the scanning is done. Then again click on the Start button. In the recently appeared search box enter Windows Update Stand Alone. Select Windows Update Stand-Alone Installer from the results. Choose YES, then complete the installation process and finish it by selecting Close. As soon as the scan has been performed, try installing Service Pack 1 again. If the steps above don’t work for you, proceed with the ones below.
- Maybe removing the unused language packs will do the trick
To get rid of old and useless language packs, follow the steps below:
-Go to Control Panel. Select the Clock, Language and Region Menu.
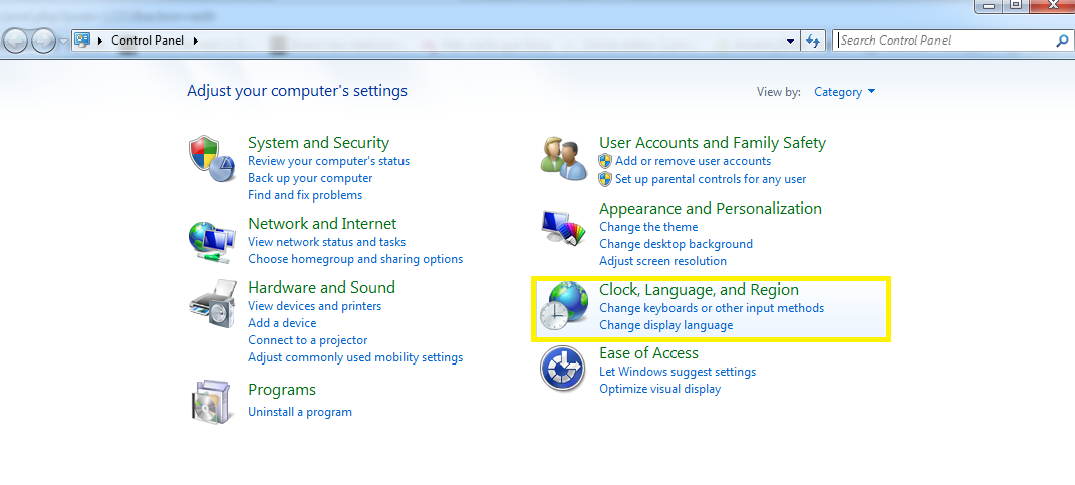
There you will notice an Install/Uninstall languages feature. Click on it, then from the generated list select the language packs that you rarely or never use and continue by hitting Next.
– Immediately after you have uninstalled these packs, you should be capable of installing Service Pack 1. If you still get the error message, stay calm and try our next potential solution below.
- These manual methods should help you install what you need to install
Make sure all the running programs and apps are terminated. Put the Windows 7 DVD into your drive. When the SetUp window comes up, select Install Now.

In case your OS is not capable of recognising the DVD, go on with the following steps:
Hit Start, then enter Drive:\setup.exe in the search box. Choose Setup.exe from the Software programs record. When the corresponding window pops up, from the options inside it proceed with the Install Now one. It is also recommended that you go online for detecting the necessary and most up-to-date updates that are available. For that purpose enter CD key when prompted.
From the list of the operating systems, choose yours and the updates that fit it. Simply select YES to agree with the Microsoft Software License Conditions. On you monitor you will see many options for installation. Choose Upgrade from them. As soon as the installation has been finished, simply reboot your device.
– Finally you should be able to incorporate Service Pack 1 into your PC.


Leave a Reply